
In this article we’re going to talk about our long weekend in the Florida Keys and our sorta failed attempt at camping on a mangrove island near the Middle Keys. We’ll talk about:
- Where to go
- Stuff to do
- How we could have improved our trip
- New gear that worked for us
Road trip! This is the second Thanksgiving in a row we’ve packed up with some gear (and a cooler full of food!) and hit the road without reservations. Last year we headed up to Georgia to see Amicalola Falls and hit a little bit of the Appalachian Trail.
This year, heading into the Florida keys is a little bit more risky considering there probably won’t be a state park or hotel that hasn’t either been booked up for months or will end up costing $400/night if finding a place to camp totally fails.
The goal is to kayak out and find a key to camp on…easier said than done when you’ve got 4 elements that all need to happen to hit the sweet spot.
1) Launch: need to find a place to launch the kayaks where you can also park
2) Parking: park overnight without concern
3) Location: still be able to kayak a manageable distance to our key of choice
4) “Campable” Land: there needs to be enough exposed sand to camp on without concern of the tide washing your tent away in the middle of the night. Easy as pie! Ha ha
A plus of this trip is that the goal is for it to cost us not much more than it would if we had stayed home for the long weekend. Besides gas, we think we can make it happen if we are diligent about eating the food that we packed rather than eating out or eating on the road (healthier too!)
Luckily, Grant lived in the keys for a handful of years and has enough basic info to have a few options for where to start. From our house the middle of the keys is about a 4 hour drive.
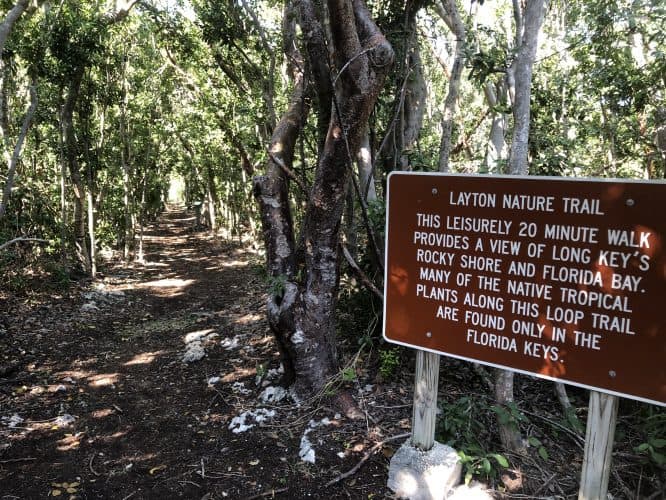
With kids and a stop for lunch, it’s a fairly painless drive (with a movie or two on the iPad!) we even stumbled on this perfect trail to stretch our legs and let the boys take a quick pee 😉 Layton Trail was right on US-1 just south of the flashing light as you pass Peir 88 on the gulf side of Long Key (Layton). Totally shaded and just like 200 yards to the water, it made a perfect 7-10 min pit stop without an ordeal.
Getting down to Cudjoe Key was our goal, lots of small islands on the gulf side will give us options. There are plenty of keys to choose from, over 1700 keys exist in the entire archipelago! Parking the car took some local knowledge of a small, quiet boat ramp at the end of Blimp Road, but now you know too 😉
We pretty much went straight there since it was getting a little late in the day. Arriving at the quiet boat ramp and selecting minimal supplies to load up on the kayaks to take out for the night surprisingly took us an hour to consolidate, organize and pack before getting out on the water.

While there are lots of small keys that make decent options for beaching a kayak and /or camping, we totally overestimated how long it would take to get out to them. You should expect to cover about a mile every 15 minutes at a somewhat leisurely pace. That is not taking into account wind or currents.

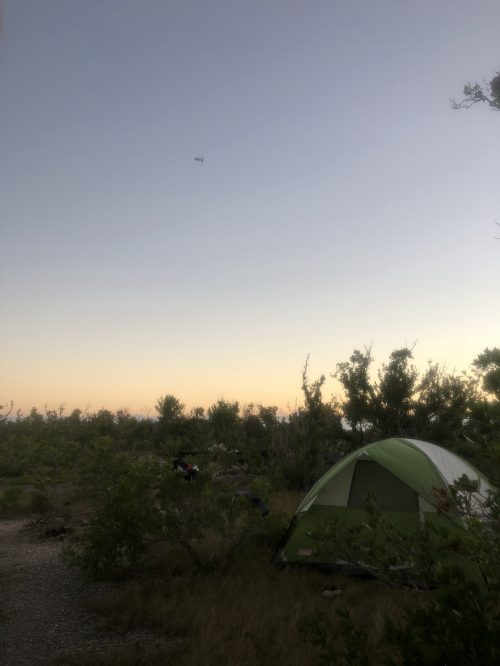
After checking the first couple that were all too thick with mangrove, we landed on Budd Key with a small rocky road up to some higher, dry ground. We had originally hoped to check out Tarpon Belly and go on to Raccoon Key, but considering we didn’t even get as far as Tarpon Belly, and it was quickly approaching sunset, we really had no choice but to make camp on Budd Key.

We followed the rocky trail into higher ground. The down side was how rocky it was and the no-see-ums hit us almost immediately upon kayaking up to the island. While Grant and I were able to endure the pesky bugs, the boys were not such good sports and really couldn’t care less about getting the tent set up before dark like we did.

Despite this, Brogan decided to try his hand at “campfire for beginners tutorials” -not bad for his first video…
Nonetheless, we got it done and they hung up in the tent until it was dark and clear of the no-see-ums. We set up the rest of our camp for the night and settled in the best we could. We later learned that the no-see-ums in the keys seems to be a bigger problem that they have been in the past possibly due to last year’s hurricane.
Anyways, let me not sugar coat how our “sleep” was on the island . . . it was a special kind of hell once the no-see-ums realized they could get in through the mesh windows of the tent and hammer away at our exposed skin.

They were so relentless, we all gave up on sleep and stayed by the fire all night, or at least until about 4am when we decided that a moonlight kayak trip was the best next move. Having enough of the no-see-um torture, we loaded our kayaks as quick as possible and got back out on the water.
I will say that the kayak trip back to the boat ramp under the full moon, with the water perfectly still, was once of the most enjoyable kayak trips I’ve ever experienced. The down side is the PTSD we all now have at the thought of no-see-ums.
Its important to note here that although we had the pleasure of a full moon to guide our way, the mangrove shore itself was still very dark and luckily I had made note of where the boat ramp was on the way out so I could navigate home on the return trip.
The only problem was that I didn’t expect to be returning in the dark! Fortunately, the radio towers I was using as landmarks had flashing red lights on them at night so it made finding them much easier.
Once we were back to the car, we caught a couple hours of shut eye – enough to make it through to sunrise.
The next day was enjoyable with a trip over to a local park to let the boys play, an art show with some great, low-key live music in the shade and a late afternoon beach trip up to Bahia Honda State Park ($8/vehicle) for a quick swim and a great sunset.

We stayed the night with our friends on Big Pine Key to get some decent sleep for the kids (and ourselves!) but headed back out first thing the next morning to be sure to hit our goal of seeing Indian Key closer to the upper keys. Indian Key was basically the county’s “Main” island in the 1830’s complete with a General Store, a Blacksmith Shop, A Town Square, a Post Office and more.
The island has a cool history, but is now abandoned ruins that make for really cool half day trip. Before paddling out to Indian Key, we couldn’t help but stop at Robbie’s and, as expected, our boys didn’t want to leave. Robbie’s is the famous tarpon feeding spot on Islamorada were you can pay just a couple bucks per person to see some of biggest Tarpon you’ve ever seen, all hanging around the docks.
 Even if you don’t buy the $4 bucket of fish to feed them, you can be sure to see someone who is and the frenzy will most definitely make for some great entertainment as you pass through the middle of the keys. If you’ve got kids with you, the $4 is especially worth it! For $4, its a fairly generous bucket of fish, so we didn’t pass up this opportunity to lure some tarpon (many of them easily 6 feet long!) and snap a few pictures.

Ok, on to Indian Key. We parked on the Gulf Side of the bridge that is just North of Robbie’s and paddled under the bridge and around to head out (East) to Indian Key on the Atlantic side.
 Reading some other blogs, we anticipated the paddle taking close to an hour with two little kids, but it only took us 15-20 minutes, really not that bad at all. When you are headed out to the Island, aim yourself to the dock that is coming off of the south (right) side of the island.
There will be a Kayak landing spot just before you get to that dock, look for a red post with a sign on it about 15 yards off the shore. Plan to have some cash on you, there is an honor system payment box for $2.50/person, kids 6 years and under are free.
Besides a few bucks and a mask, there is no need to bring much with you, except maybe lunch or some drinks if you are planning to hang out. There are paths all around the island that were basically the same as they were in the island’s heyday, a grid of “sidewalks” with a town center in the middle of the island.
As you walk these paths, there are well-placed little signs filling you in on the island’s history and what you are seeing, or what used to be there. Even our kids were interested in hearing what some of the signs had to say. The lookout tower was especially cool to get a good overview of what was there. There were a couple small crumbling features that you could only see from the tower, so be sure to look carefully!

We spent about an hour exploring the island and when we were done, we jumped back in the kayak and continued the rest of the way around the island, taking to opportunity to jump in and snorkel along the northern coast.
The water felt great (especially on the bug bites from the beginning of the trip!) and was a nice depth to explore what was going on under the surface with the kids in tow. We kept it simple and even swam along the shore, just sort of lazily holding onto the kayaks with the kids jumping in and out of the water.

This worked out REALLY well considering the coast line on that north side of the island was pretty rocky and jagged and may have been tough for the little ones to navigate. Staying in and around the kayaks in the water just off the shore was rather ideal and very enjoyable.
After about 45 minutes of swimming around, we jumped back in the boats and paddled back enjoying the clear water and the shallows underneath that could be seen along the way. All in all, from the time we arrived and parked the truck to the time we returned back to the truck and re-loaded the kayaks, this little trip took us about 3 hours which we simply incorporated into our return trip heading back north.
If you don’t have access or a way to bring your own kayak, you can rent one at Robbie’s and plan a really nice 1/2 day portion of your trip in the Keys whether you are headed in or out! The paddle out to explore Indian Key is not difficult and is great with little ones or even older ones. We highly recommend taking the time to get out to Indian Key!
Gear Review
I like to use trips like these to test out new gear. One of the things I tried are U/V blocking sleeves. I’m not sure what they are made of (lycra?) but they essentially go over your arms from mid bicep to wrist. They stay in place well due to a grippy kind of material on the larger end where it goes around the bicep. They block the sun, no-see-ums, dry fast and when you don’t need them just stash them in your pocket. I like not having to mess around with long sleeve shirts or greasy sunscreen.

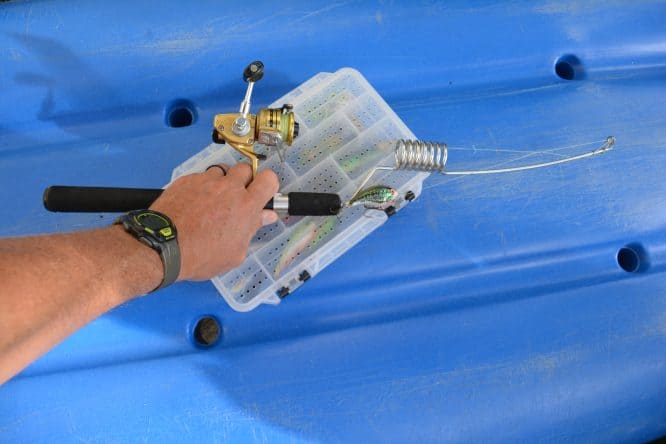
I like fishing…but not all the gear. Because of their size, conventional rods are a pain to travel anywhere with. I really like the idea of being able to have compact fishing stuff with me. What I did on this trip was take just one small tackle case (about the size of a book) and my mini-rod.
This is a rod made by a company called EmmRod. Definitely unconventional but just the kind of novel solution I was looking for. Its got all the action of a larger rod because of the coils but takes up only about 18″. If you think you need a large rod to catch large fish think again!

Everything you need for fishing could fit into a backpack. A small backpack.
There was also two pieces of camping gear that I field tested as well. I have been on a quest to seriously streamline our camping gear to really cut down on weight without sacrificing comfort. We used to use this gigantic blow up mattress that required a battery powered pump.
As you can imagine it was heavy, loud and cumbersome. After the mattress developed a severe leak I started looking at inflatable sleeping pads and pillows. I settled on the Kingsley inflatable sleeping pad and the Trekology inflatable pillow.

My concern, as a side sleeper, that I would end up being uncomfortable on this seemingly thin pad. I thought it couldn’t possibly keep me off the ground…but I’m glad to report that I was wrong. It turned out to be quite a pad for its size. It really only requires a few breaths and you’re good to go.

This was also true for the well-designed Trekology inflatable pillow. It has a cool little inflater that allows you to click it once to open the airway and another click to close it. That means that once you blow it up you can regulate how much air you let out so you can adjust the firmness to your liking.

Even though the Kingsley pad comes with its own pillow, I was warned that it would not be up to snuff so I opted for a separate pillow. Together, the pillow and sleeping pad only cost around $55. Not bad for super low profile, light gear. Definitely gear worth checking out if you are like me and want to trim down your gear weight but still be able to rely on it to be comfortable.
As you can see from this free campsite locator website, campgrounds in the Florida Keys are notoriously hard to come by and if you want one you will need to book far out in advance. If you want a decent review of tent camping in the keys Florida Rambler breaks it down here.
Otherwise you may have to wing it, like we did. Just make sure you are prepared with the proper no-see-um netting for your tent because that can save a camping trip for sure! I hope you are inspired to go find an island somewhere and camp on it because its a different kind of experience and life is all about experiences, right?!
If you have any island camping experiences you want to put out there just hit the comments below!


Comments are closed.