

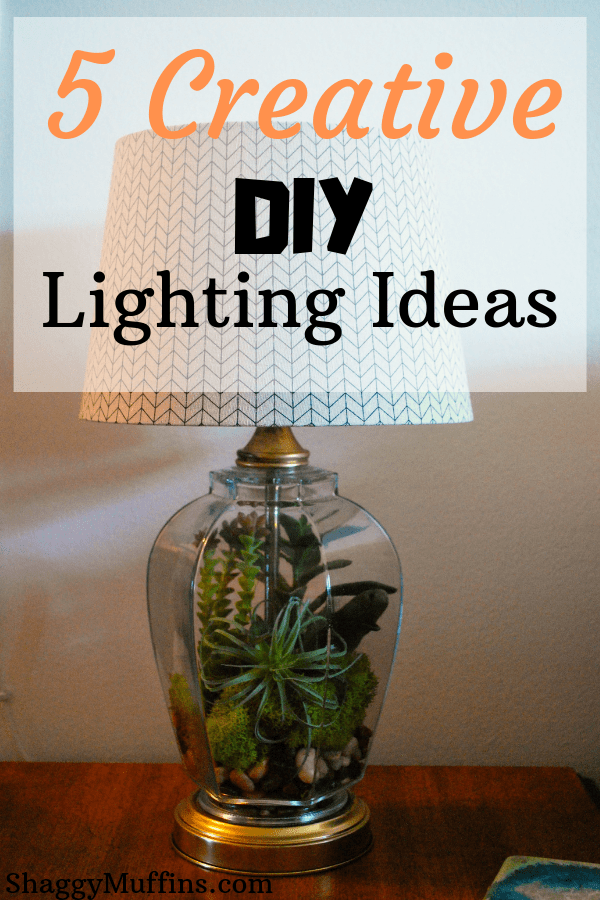
In this article you’ll learn step-by-step directions on how to achieve 5 different DIY lighting ideas for your home. If you are looking for something to spice up (and light up!) a room AND you want the satisfaction of knowing you whipped it up yourself then read on. This article will cover ideas like spherical pendant lamps to terrarium lamps. Let’s get to it!
Lighting is an important element of any room’s decor, and can often be one of the most difficult elements to decide on. When you step into a room, it’s simply expected that there will be some form of a lighting fixture, but you’ve probably never put much thought into how a particular lighting fixture was chosen.
When decorating (or redecorating) your home, you’ll likely be faced with choosing a lighting fixture for each room – possibly for the first time. If you left the furniture store unimpressed with their selection of lighting options, or simply want something unique for your room, it may be time to think DIY.
Here are 10 DIY lighting ideas that are sure to add a one-of-a-kind element to any room in your home, complete with step-by-step instructions for each one.
Hemp String Pendant Lamp
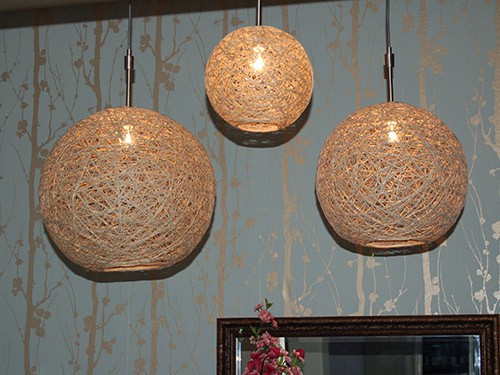
It’s hard to believe that these beautiful, stylish hemp string pendant lamps are an easy DIY project. Small hemp string pendant lamps start at $50 or so on Etsy, but you can make them yourself for much less – plus making them is so fun! Here are the best DIY instructions we could find – and the results are fabulous!
What you’ll need:
- Rubber balls of various sizes (you can find these at Wal-Mart and even some Dollar Trees)
- Clear-drying craft glue (we recommend Aleene’s Clear Gel Tacky Glue) – about 1 bottle per hemp string pendant lamp
- Hemp string – 20lb. Weight –
estimated amounts needed:
- 16-inch diameter ball—400 yards
- 14-inch diameter ball—300 yards
- 9-inch diameter ball—100 yards
- Plastic gloves (optional)
- Trash bag or small drop cloth
- Permanent marker
- Ball inflating needle (these can usually be found at Wal-Mart or sporting goods stores)
- Light fixture(s) and hardware (these can be found in hardware stores or online)
Step One: Draw a medium-sized circle on the ball with a permanent marker. This circle will mark the space on the lamp that needs to remain clear of string.

Photo: craftynest.com
Step Two: Cover your work surface with a trash bag or a drop cloth.
(Optional: put on gloves – the next part gets messy)
Step Three: Liberally apply glue to the string as you wrap it around the ball, being careful to avoid the marker circle. (The string should stick fairly well to the ball as you wrap it – if it’s not sticking, use more glue on the string.)
Step Four: Continue to glue the string and wrap it around the ball. (Take care to avoid criss-cross patterns.) The more densely wrapped the ball is, the stronger your hemp string lamp will be.
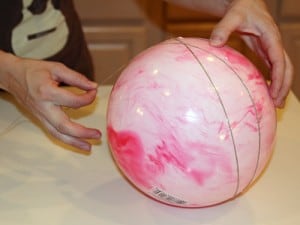
Photo: craftynest.com
Step Five: Let the glue dry completely – this will take about 48 hours.
Step Six: Use the inflating needle to deflate the ball, carefully removing it from the lamp through the hole.

Photo: craftynest.com
Step Seven: Follow the instructions that come with your light fixture to install it. While installing the light string, feed the wires through the circular hole of the lamp and up through the top, so that the light bulb will hang down in the center of the sphere.
And there you have it – you’ve made your very own hemp string pendant lamp! Repeat steps one through seven to make as many as you like.
Faux Capiz Chandelier

Photo: thesweetestdigs.com
Faux Capiz Chandeliers are beautiful, fanciful, and just plain fun to look at. But they’re even more fun to make! Sure, you could order a real Capiz Chandelier for $200+ from Pottery Barn or the like, but this Faux Capiz Chandelier looks just as good and can be made for a fraction of the price. We surfed around and found a lot of different DIY tutorials, but we think this one takes the proverbial cake.
What you’ll need:
- A hanging flower basket (the color you want your faux capiz chandelier to be)
- Wax paper
- An Iron
- Sturdy string
- A glue gun
- Scissors
Step One: Cut about 30 sheets of wax paper (this is especially easy if you have a roll of the preportioned sheets), and iron two sheets at a time together. It only takes about 30 seconds of ironing for the sheets to stick.
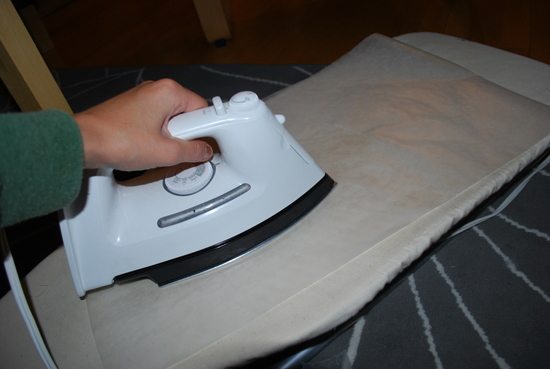
Photo: thesweetestdigs.com
Step Two: Once the sheets have cooled, it’s time to cut out the circles. You could use a circle punch for this, or you can trace a circular object and cut them out that way. You’ll want to cut out as many circles as you can from your wax paper sheets.
Step Three: Cut your string to length. The length of the string will be determined by how big your flower basket is, so cut a few sizes and decide which size you like best.
Step Four: Begin gluing your circles to your string. In the example, there were approximately six circles per string. Get comfortable, you’re going to be making a lot of strings of circles.
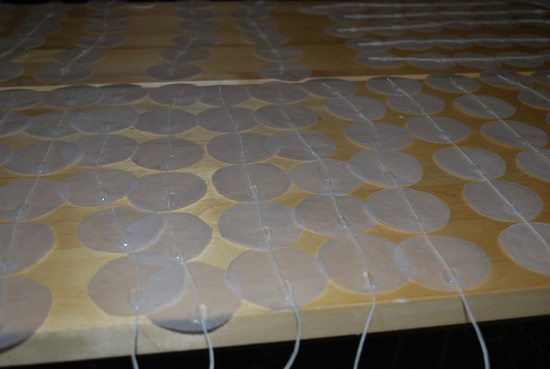
Photo: thesweetestdigs.com
Step Five: Next you’re going to start tying your strings to the basket, taking care to tie them close enough together that there are no large gaps. The example basket had three levels, so strings were tied around each one.
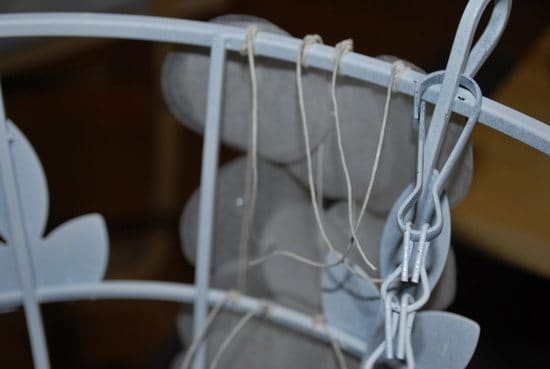
Photo: thesweetestdigs.com
Step Six: Cut off the excess string and arrange your new faux capiz chandelier.
That’s it! You now have a fun and fanciful new lamp for any space in your home!
Diamond Ribbon Lampshade
This DIY lighting idea is a fun and simple way to add style to an otherwise plain lamp. The instructions are from Curbly.com, and the end product is just too cute!
What you’ll need:
- 10 yards of Cotton Herringbone ribbon
- Lampshade (8″ H x 9″ W) (cylindrical, with the top and bottom the same size)
- Chopstick
- Hot glue gun and glue sticks
- Tape measure
- Pencil
Step One: Using a pencil and tape measure, make tick marks around the top and bottom of your shade, starting and ending at the same point, roughly three inches apart. There are nine tick marks in the example.
Step Two: Pin a strip of ribbon diagonally across your lampshade. Starting with a tick mark on the top of the shade, move your ribbon one tick mark ahead on the bottom portion of the shade. This staggering will create several diagonal lines.
Step Three: Attach the ends of the ribbon to the edges of the lampshade with hot glue, taking care to leave enough ribbon on each end to wrap around the edges for a cleaner look.
Step Four: Starting at the top of the shade, place a strip of ribbon on top of one of your initial pieces, pin in place, and line it up diagonally with the ribbon the next slot over at the shade’s base.

Photo: Curbly.com
Step Five: Repeat step four until you’ve finished!
There you have it – you’ve made a cute diamond shade that’ll add a pop to any room’s decor!
Terrarium Lamp
These creative and one-of-a-kind lamps are a fantastic way to add a unique touch to your decor. They’re easy to make, low-maintenance, and a great way to add greenery to your home. Terrarium lamps come in all shapes and sizes, just like terrariums themselves. Follow these easy, step-by-step instructions to make your very own terrarium lamps!
What you’ll need:
- A large glass jar with a lid
- Green moss
- Colored moss
- Sand
- White rocks
- Succulents
- Glue (we suggest hot glue and E6000)
- Lamp kit
- A lampshade
Step One: Add the sand to your jar. Be sure to tilt the jar to one size, so that the sand pile is taller on one side than it is on the other.
Step Two: Add the rocks.
Step Three: Arrange your plants and moss however you like.
Step Four: Glue the base of your lamp to the lid of your large jar and let the glue dry completely.
Step Five: Place the lid on your jar and put on the lampshade.
There you have it – you now have your very own DIY terrarium lamp!
Tulle Pendant Lamp
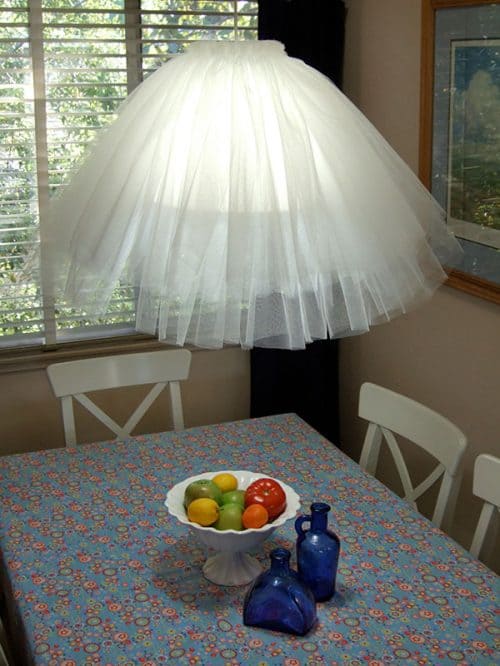
Photo: craftynest.com
Tulle pendant lamps are as unique as they are versatile. A black tulle lamp looks great with modern bedroom decor, a pink tulle pendant lamp would make a super cute addition to a little girls’ bedroom, and a white one would look great in a laundry room or linen closet. The possibilities are really endless. Want to make your own tulle pendant lamp? Follow these simple instructions!
What you’ll need:
- 10 yards of 54″ wide tulle (any color)
- Embroidery floss (it should match the color tulle you choose)
- Melodi pendant lamp (preferably painted to match your tulle)
- Light bulb
- Large embroidery needle
- Rotary cutter & mat (these are essential. It’s impossibly hard to do it without them)
- Binder or bulldog clip
- Safety pins
- Straight edge knife
Step One: Using your rotary cutter and mat, cut a 17-inch wide strip of tulle lengthwise.
Step Two: Next, take your remaining tulle, which is now 37 inches wide, and fold it nearly in half, leaving one side 3 inches longer than the other.
Step Three: Lay the folded tulle flat, with the shorter side on top, then lay the 17-inch piece of tulle on top of the folded piece of tulle, lining up the top edges and sides. You should now have three layers of tulle, the bottom layer being three inches shorter than the top two layers.
Step Four: Now, pin all three layers together at the folded edge, about half an inch from the fold, spacing each pin about 12 inches apart.
Step Five: Using your rotary mat as a guide, sew a basic basting stitch one inch from the edge of the fold, spacing your stitches about ¼ inch apart. Begin and end your basting stitch about one inch from the sides of the tulle. Clamp your spool of embroidery floss at the end and anchor it to allow for adjustments in length later on.
Step Six: Remove the safety pins and gather the tulle together as you go.
Step Seven: Then, when you get to the end, overlap the right and left sides about an inch to an inch and a half and pin in place.
Step Eight: Continue to stitch until you reach the other end of the floss, then remove the needle and trim the thread on both sides, taking care to leave enough floss to tie a knot.
Step Nine: Wrap what’s now a tulle skirt around the lamp and tie a knot.
Step Ten: Finally, insert the cord kit and a light bulb.
There you have it – you’ve made your very own tulle pendant lamp! All you have to do now is follow the instructions that come in your light kit to install your new tulle pendant lamp.
You can make any – or all – of these fun, DIY lights to add a touch of creativity to your decor in any room of your home.
Did you like any of these creative DIY lighting ideas? Have you tried making one or have your own that you just gotta let everyone know about? Let us know in the comments down below!


Comments are closed.